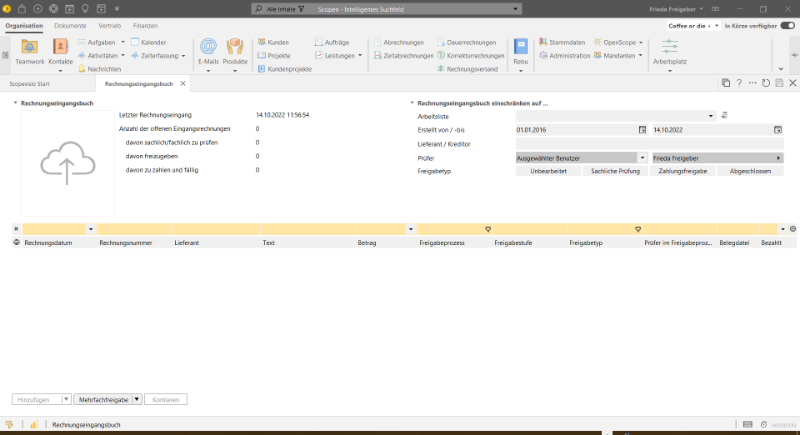
The different perspectives or roles
Scopevisio's Rebu presents itself to you differently depending on whether you are a data entry clerk, factual reviewer or responsible for payment approval. The actual form is presented here from the different perspectives.
The data entry clerk and their tasks
First of all, a general responsibility for the invoice receipt book must be defined. This can lie with a responsible person, position or department who has the task of formally checking the incoming invoices, checking OCR results and adding further dates, assigning the document to a release process and monitoring this administratively. In particular, it keeps an eye on the timely flow of documents through the process. In Scopevisio, we refer to this as the creator. They are responsible for the preliminary check.
As a creator, you need at least the "Invoice receipt book" right. If you are also an administrator, you must also be assigned the "Invoice ledger (administrator, all documents)" right.
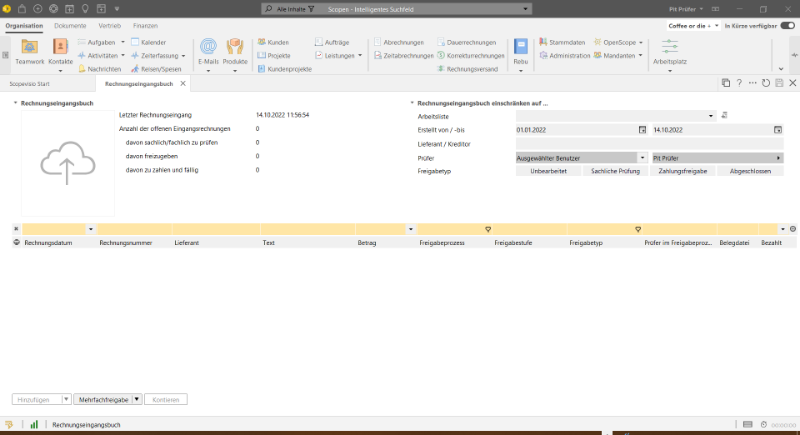
You are under Organization > Rebu > Invoice entry.
Here you can see an initial summary of incoming invoices.
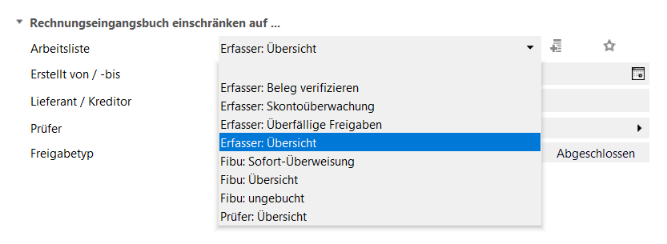
Use the filter functions to restrict the view. Scopevisio provides some standard worklists that you can further customize or to which you can add more.
The view of the overview table depends on the selected worklist. Here you can see the general data entry overview.
The buttons are applied to the selected line(s). Multiple selection is also possible.
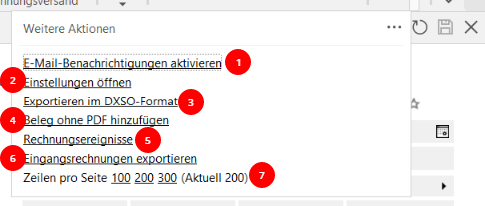
You can call up additional options via the other actions.
The various work lists
Here is an overview of the worklists offered by the system. These can be extended as required.
The functions behind the additional actions
You will find further actions in the three-dot menu.
Activate e-mail notifications here, which you can further define via the activity journal.
This takes you to the settings, which you can optionally access via System menu > Manage accounting > Incoming invoice settings. The release processes and rules can also be found there.
You can use this function to export invoices for the auditor.
Use this menu item to create an incoming invoice for which you do not have a PDF.
Changes to invoices can be tracked in this log.
You can export incoming invoices via this call. More on this in the article Invoice export.
Change view settings here.
The invoice detail form
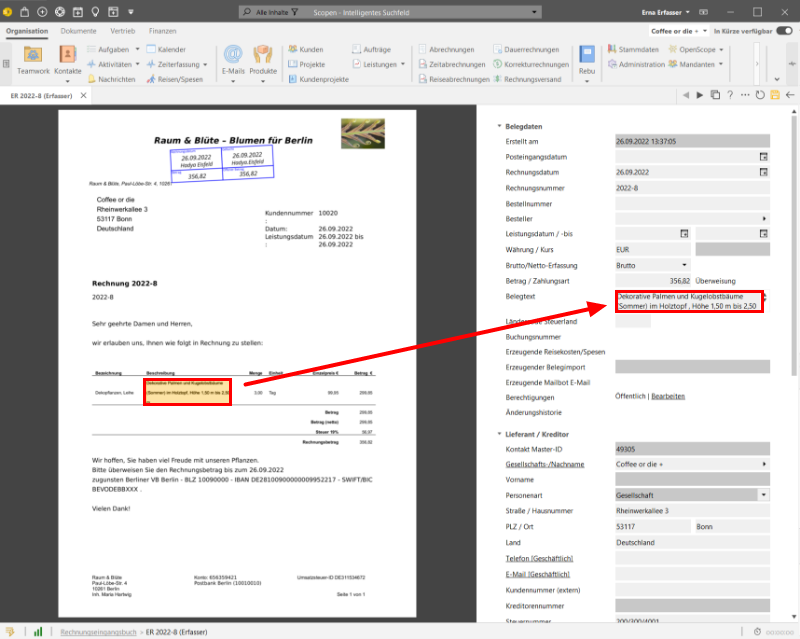
Once you have selected an invoice in the overview table and either double-clicked or clicked on the "Enter" button, the detail form opens. Fields highlighted in yellow are mandatory fields.
Instead of typing, move the mouse over the relevant part of the invoice on the left-hand side and the text recognized by OCR will be copied into the field on the right.
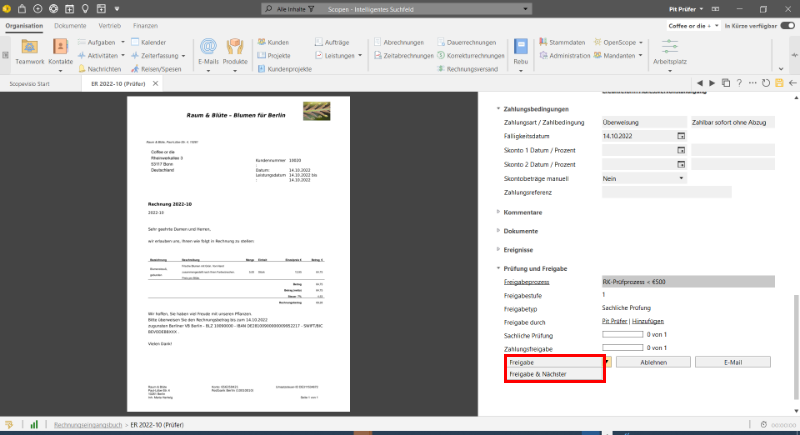
Once you have entered all the necessary information, set the relevant approval process in the "Verification and approval" business object and click on "Verification". "Verification & next" directly calls up the next document without you having to go back to the overview.
For you as the person entering the data, the work on this invoice is done.
If you go back to the overview via the small link arrow, you will see how the status of the invoice has changed and that it has now been forwarded to the substantive verifier.
To keep the display clear, hide completed invoices.
The reviewer/approver perspective
As a reviewer/releaser, you need at least the "Invoice receipt book (check/release)" right. To initiate a multiple release, you must also be assigned the "Invoice receipt book (multiple release)" right.
The invoice receipt book
As a reviewer or approver in the invoice receipt process, you will be notified by email about invoices that you need to check or approve. The corresponding invoices are displayed under Organization > Rebu > Invoice entry and can be filtered and displayed in worklists, as already described here from the perspective of the person entering the invoice.
Select the invoice you want to check and double-click to open it.
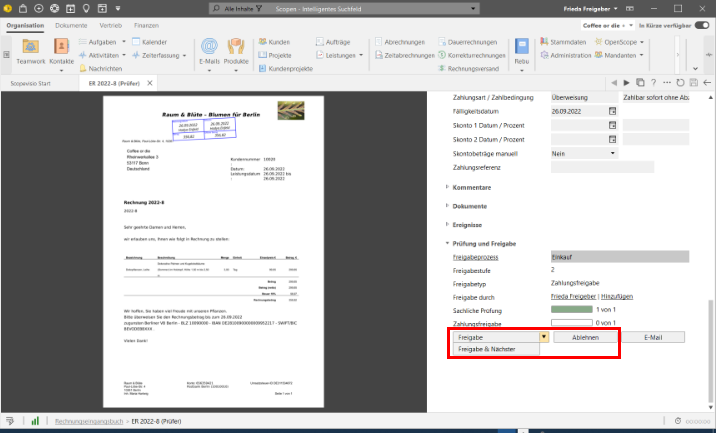
Check the details, fill in any fields marked as mandatory and confirm your approval by clicking on Approve or Approve & next to go directly to the next document at the same level.
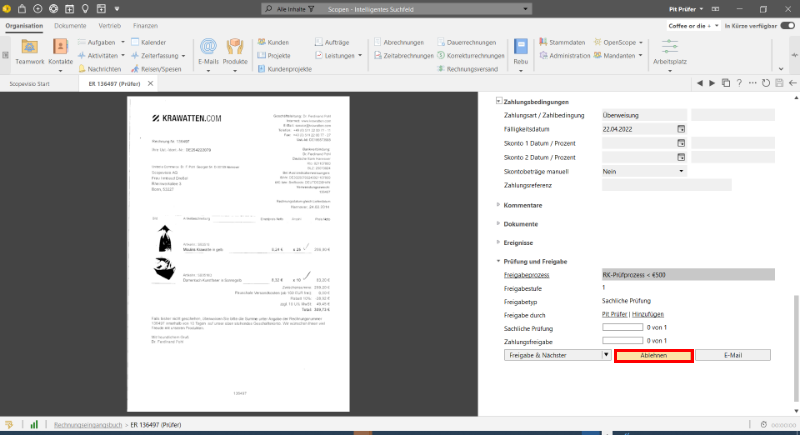
You can also reject an invoice:
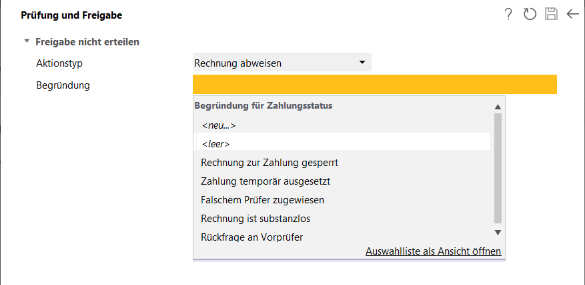
You can choose from several action types for this:
It is mandatory to provide a reason for the rejection. There are different reasons to choose from for each action type. You can also add your own, more company-specific reasons in the selection list.
In this case, the rejected invoice is returned to the creator, who can hide it for everyone.
For you as the reviewer, the process is now complete. If you go back to the overview, it will be empty.
For the person responsible for approving payments, the process is the same as for the reviewer; they are only shown invoices assigned to them and they also have the choice between approve and reject.
In their case, there are different action types than for the rejection of the substantive check, which must also be justified.
Once all invoices have been approved, the approver's workstation is also empty. The process is complete.

