Open items can be paid from Scopevisio by bank transfer, but you can also collect receivables as a SEPA core direct debit. The clearing takes place in the background in one step.
You can generate and export a SEPA XML file as well as transmit it directly via finAPI - you don't even leave Scopevisio.
Create payment run
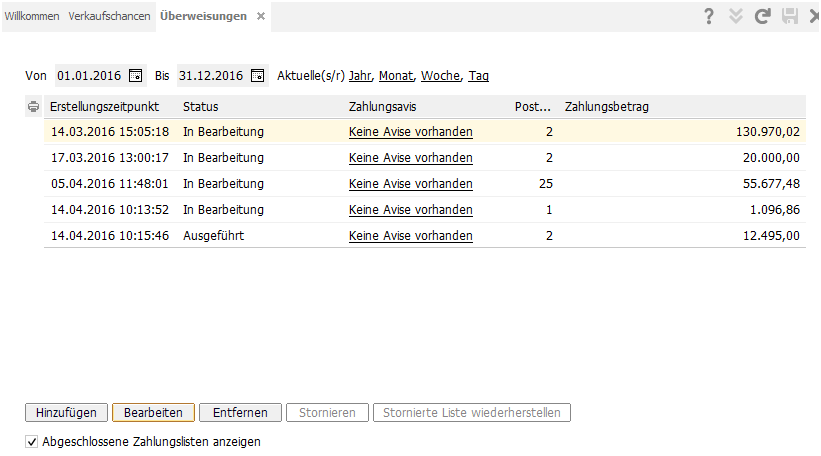
In the old menu tree, follow the path Finance > Banks > Transfers, in the new menu ribbon Finance > Payment runs > Transfers to display a list of your payment runs. You can edit, remove or cancel the runs listed here using the action buttons at the bottom of the screen.
Select open items
Click on Add to create a new payment run.
The open items list opens with a function that allows you to select items and add them to a payment list.
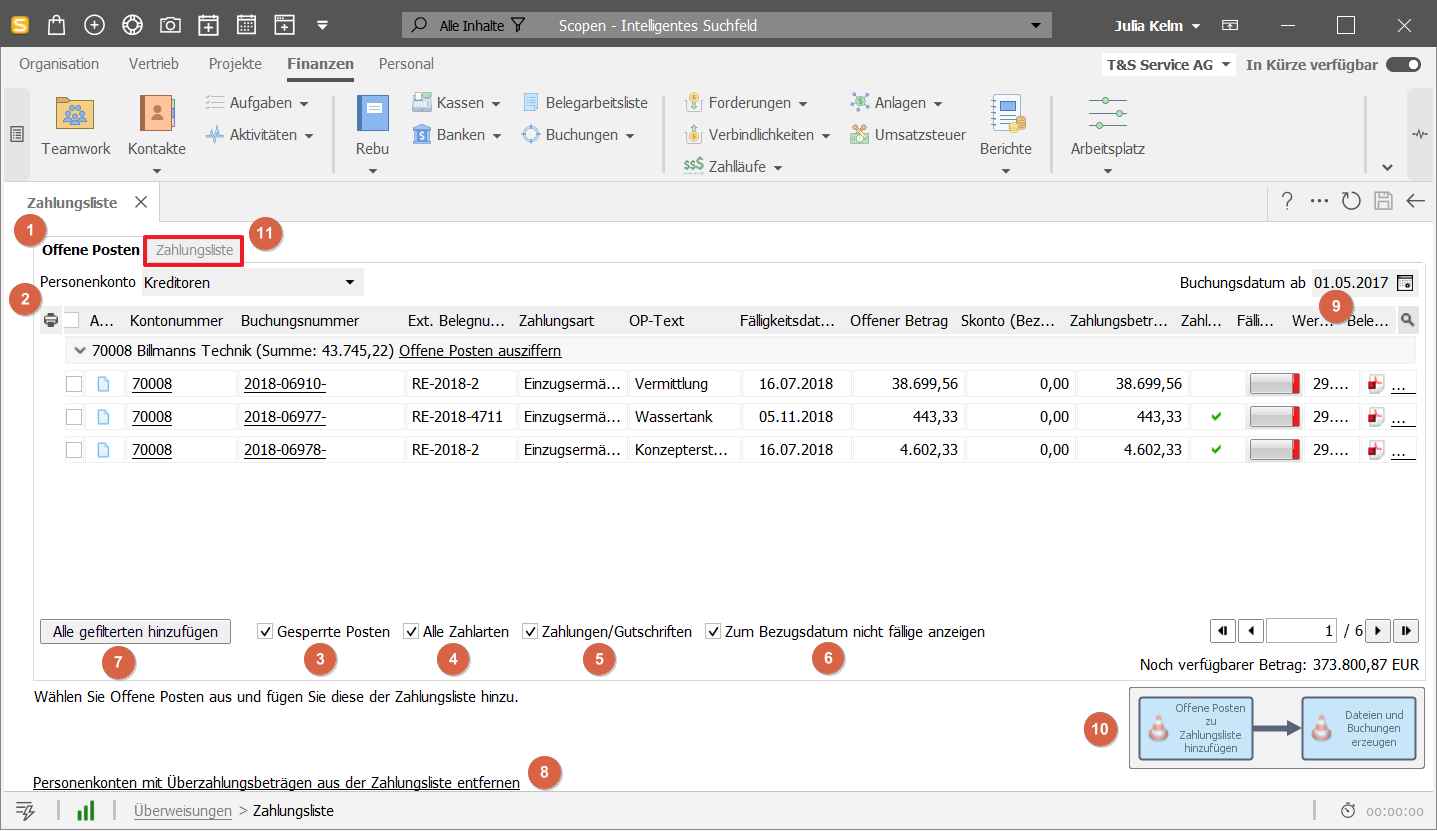
Your vendor OPs are displayed in the Open items tab. Here you select which items you would like to transfer in the checkbox column.
If you check the box at the top of the table, all items will be selected. You can deselect individual items by unchecking the relevant checkbox with a mouse click.
You do not normally want to transferblocked items, so the checkbox remains empty.
All payment methods would imply that items that are collected by direct debit are also displayed. In this case, we only want to display transfers, so this checkbox also remains empty.
Payments/credits also includes credit items in the display. As offsetting is usually desired, check this box.
Not due on reference date is ticked if payments are not necessarily made on the due date, e.g. because a discount is to be taken. The reference date is the date on which the due date of the payment condition is calculated. It is usually the date on which the payment run is to be executed.
Add all filtered adds all items filtered on all pages to the payment list.
If overpayments occur due to returns, cancelations or similar. If overpayment amounts occur due to returns, reversals or similar, these corresponding vendor items can be removed from the list.
Use the right mouse button to display the information you need. Tip: If you are working with a release process, the Payment release column is important!
After you have selected items, select the Add open items to payment list button.
Here you can later switch to the Payment list tab.
The view changes. Switch to the Payment list tab.
Payment list
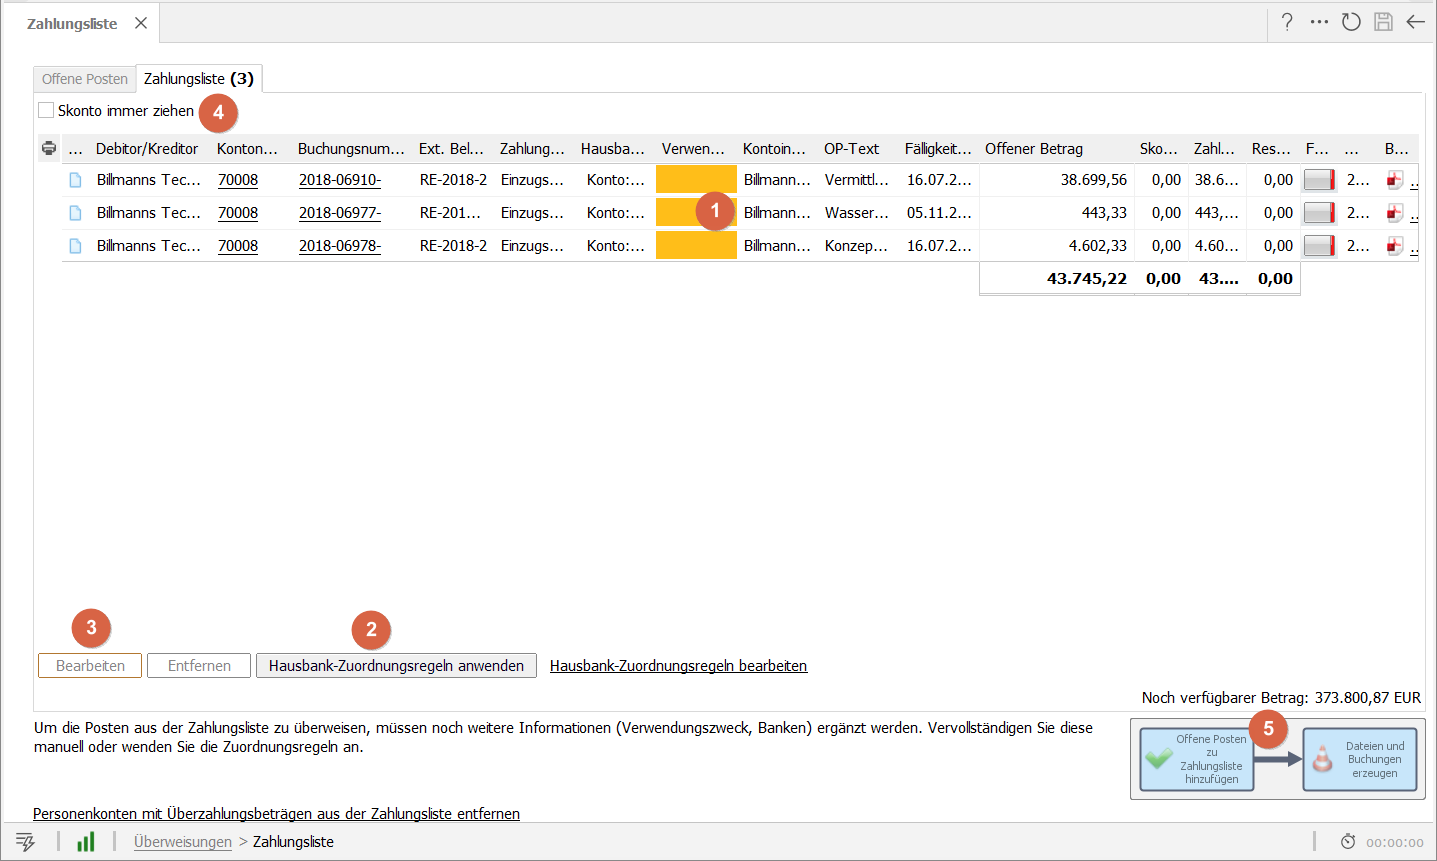
In this view, you can edit the individual items if necessary. First apply the house bank assignment rules, you can then add any missing data manually.
Fields in which mandatory entries are missing are highlighted in dark yellow. More on this below.
You can have a house bank account inserted automatically via Apply house bank assignment rules. See the article Bank statement rules. Different accounts may also have been created in the vendor master data. The specific details in the vendor overwrite the less specific details in the house bank assignment rules.
Edit the selected payment, e.g. by changing the payment amount or adding a reason for payment.
The Always take discount checkbox is only used in exceptional cases. A cash discount would be taken here regardless of the payment date. Discount rates and conditions are created in the vendor's master data.
When you are finished, you can generate your files and postings. This creates an XML file that you can import into your banking software or online banking.
Select discountable invoices for the payment run
Select Finances > Banks > Transfers
In the payment list, you have the option of displaying the discountable invoices in addition to the (final) due invoices. To do this, filter out the invoices that are not due on the reference date and then activate the Show discountable on reference date checkbox below the payment list. This will display items whose due date is less than or equal to the reference date as well as items for which cash discount deduction is possible.
Execute payment run
Click on Create files and postings to create files and postings.
Files: You can import the generated file, an XML file, into all common banking tools and online banking pages or submit it to your bank.
Postings: The posting initially uses a transit account, as the bank movement has not yet taken place. The posting is via personal account to transit account. On this occasion, the individual items of the creditor are automatically cleared.
Subsequently, when the outgoing payment on the bank statement has actually been executed, you only need to post via transit account to bank account.
Note: If conflicts or problems occur, the complete payment run will not be executed!
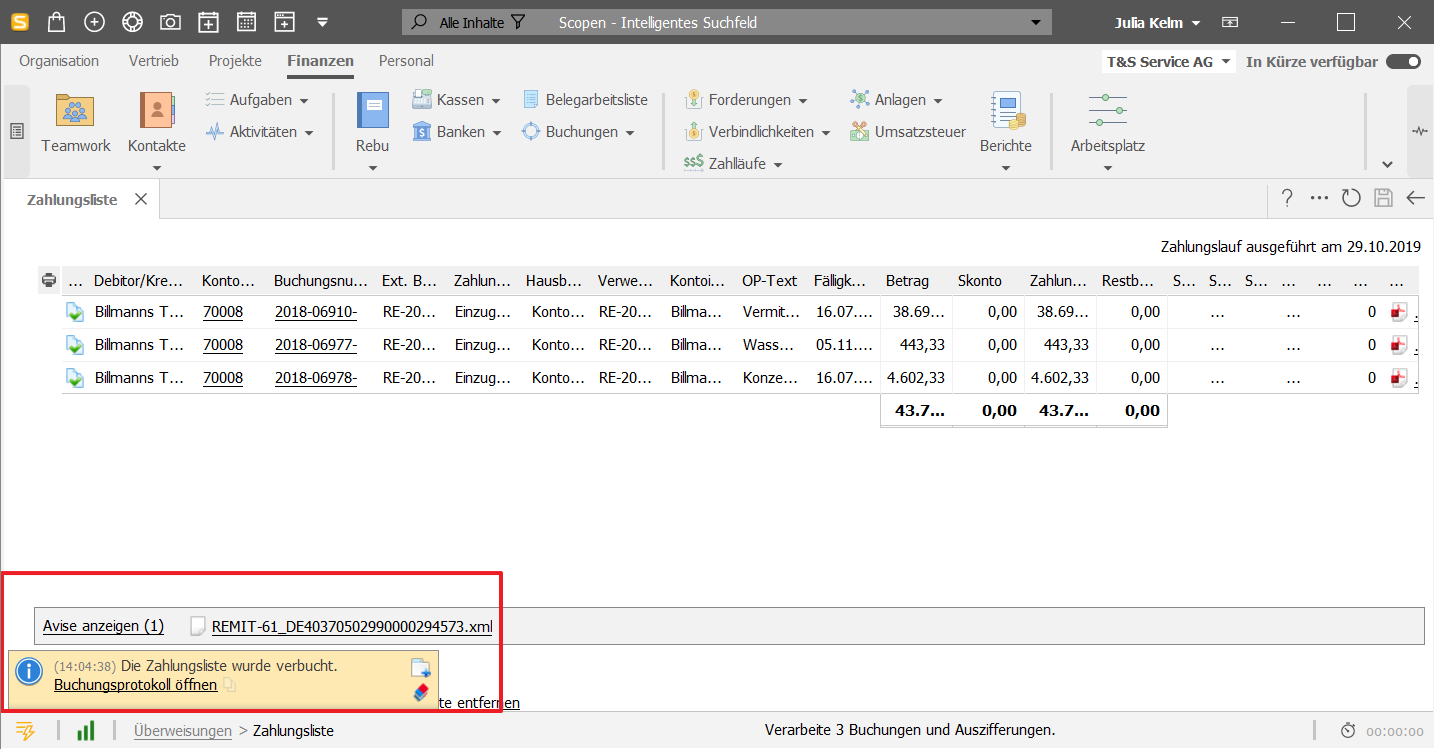
A system message informs you of the success of the operation and gives you access to the posting log.
Posting log
Advice note
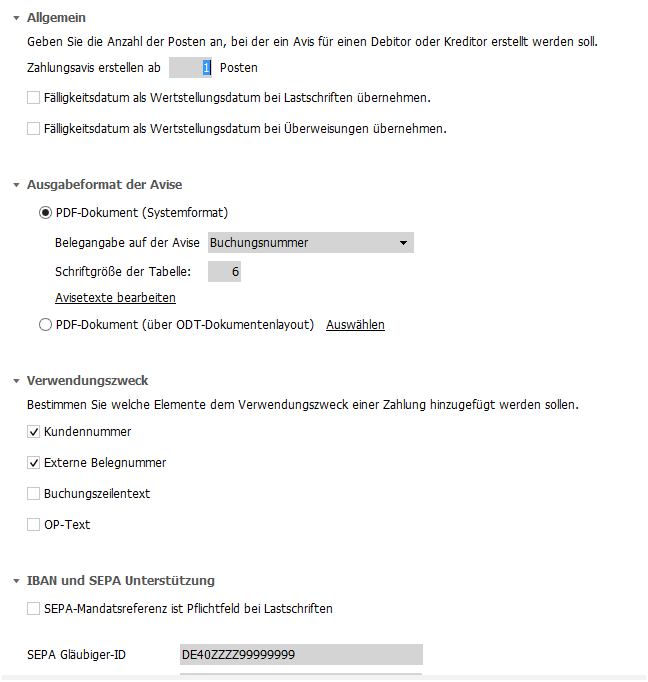
Payment advices are only generated if you have set in the master data under Banks > Configure payment transactions (Scopen: Functions / Payment advices) the number of items from which payment advices should be created.
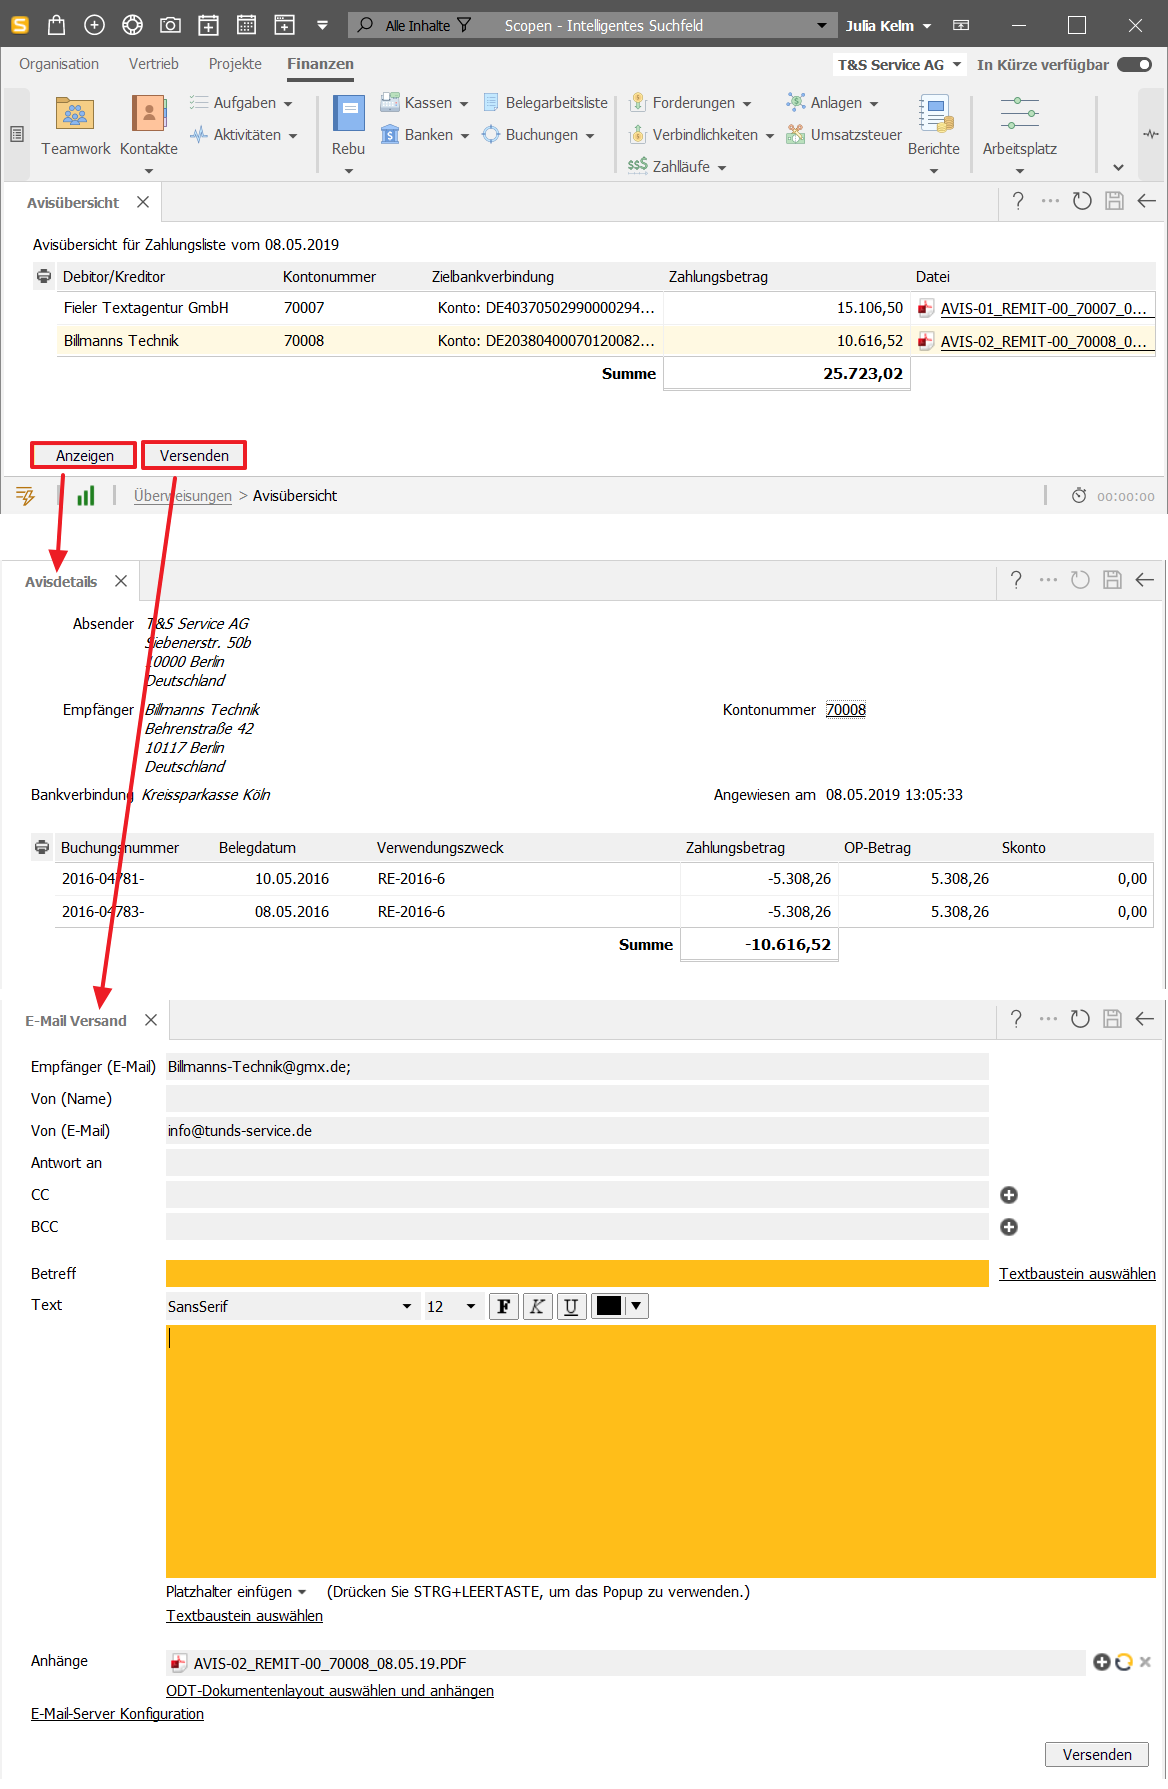
Display and send payment advices
Select the Display payment advice note link below the payment list to open the payment advice overview. Here you can display and send payment advice notes for your vendors.
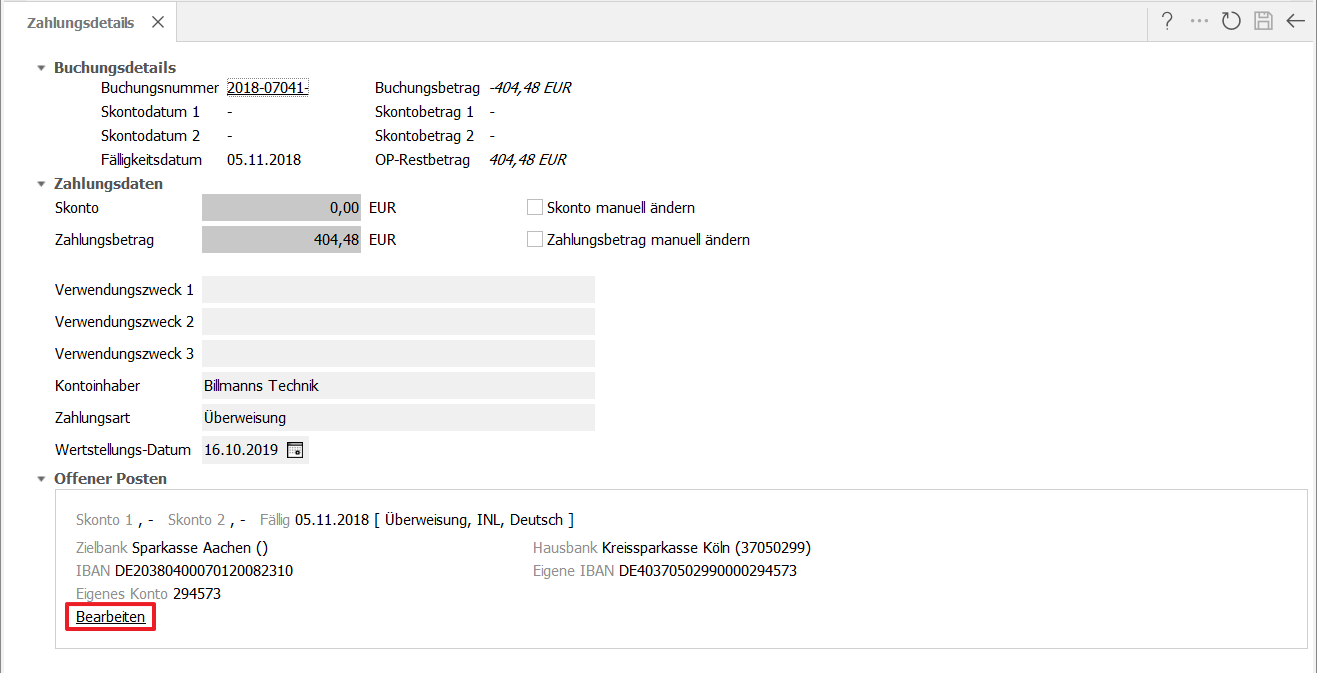
Transfers - add payment data
Yellow fields in the data line mean that details need to be added.
Double-click on such a field to open the payment details. Here you can, for example, add a reason for payment. Don't forget to save!
If other data needs to be changed, e.g. the house bank details, select the Edit link in the Open items section.
Transfers - add bank details
Yellow fields in the data line mean that information needs to be added.
Double-click on such a field to open the payment details. Here you can add a reason for payment, for example. Don't forget to save!
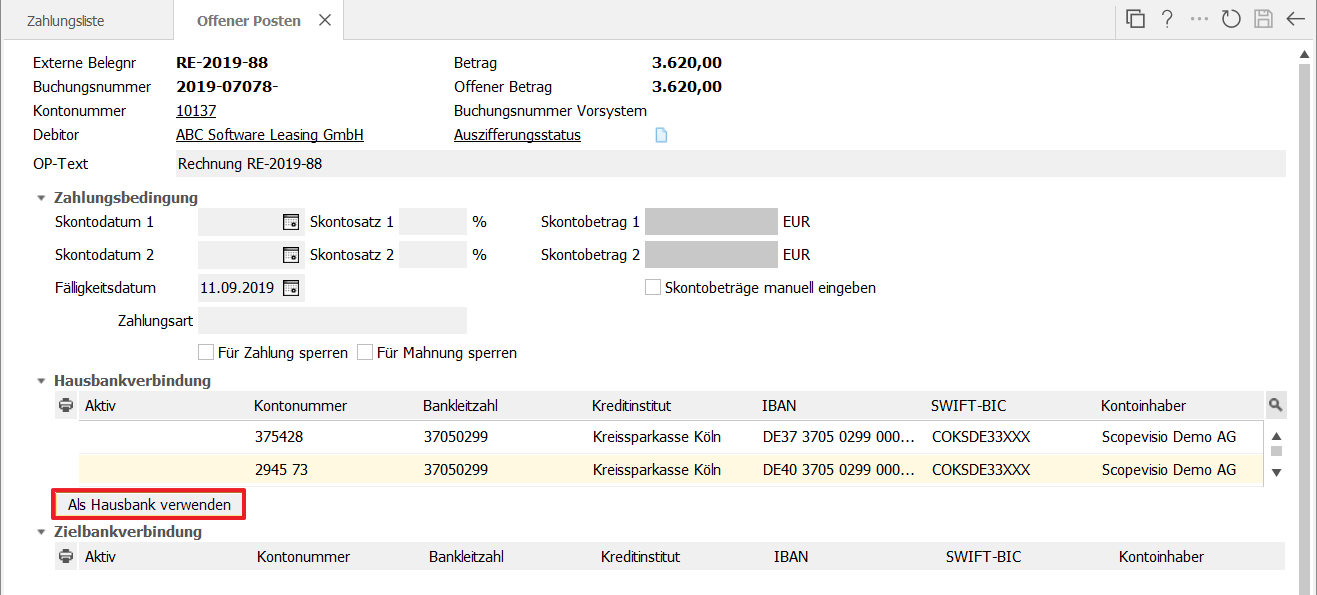
If other data needs to be changed, e.g. the house bank details, select the Edit link in the Open items section to open the following form.
Enter your changes here, save them and use the back arrow to return to the payment list.
Transfer XML file to Banking
Transfers with Scopevisio: Collective payment required
Open your banking application and transfer the XML file with your payment run to it.
The XML file with the payment run must always be executed as a collective payment. The advantage of this is that you only have to allocate a single item afterwards. If you use the Scopevisio set of rules with bank statement rules, this item is automatically assigned to the appropriate transit account using a predefined rule.
Important: An exact assignment of the transit account is possible because the assignment of bank account and transit account is unique in the settings of the house bank. This means that there are no problems with the assignment of payments later on.
If you do not initiate a collective payment when executing the payments, the Scopevisio rules do not apply and each item must be assigned individually to the transit account.
Therefore, please set the collective payment option in your banking system.
Transfers without Scopevisio: avoid collective payments
If you execute payments without the involvement of Scopevisio, i.e. without an XML file generated by Scopevisio, these should not be executed as a collective payment. If the individual items are listed, this not only simplifies clearing, but also allows the bank statement rules to be applied. This would not be possible with a collective payment.
Posting scheme
The light-colored items show the schematic posting process through the creation of the XML file. The darker movement represents the posting of the collector against the transit account, which is thus set to zero in terms of balance
