Scopevisio can significantly speed up and simplify your work processes if you post digital receipts.
This has the following advantages for you:
Receipts are read by OCR full-text recognition and many details in the posting screen are filled in automatically.
The digital receipt is always to hand.
All processing is logged and documented in Scopevisio in compliance with GoBD.
The workflow is as follows:
You define a few settings.
You scan receipts that are not already available in digital form at 300 dpi.
The documents are loaded into the document worklist or into the Scopevisio invoice receipt book. Convenient functions are available for this.
From there, the documents are processed further.
The procedure is explained below using incoming invoices as an example.
Simple document import
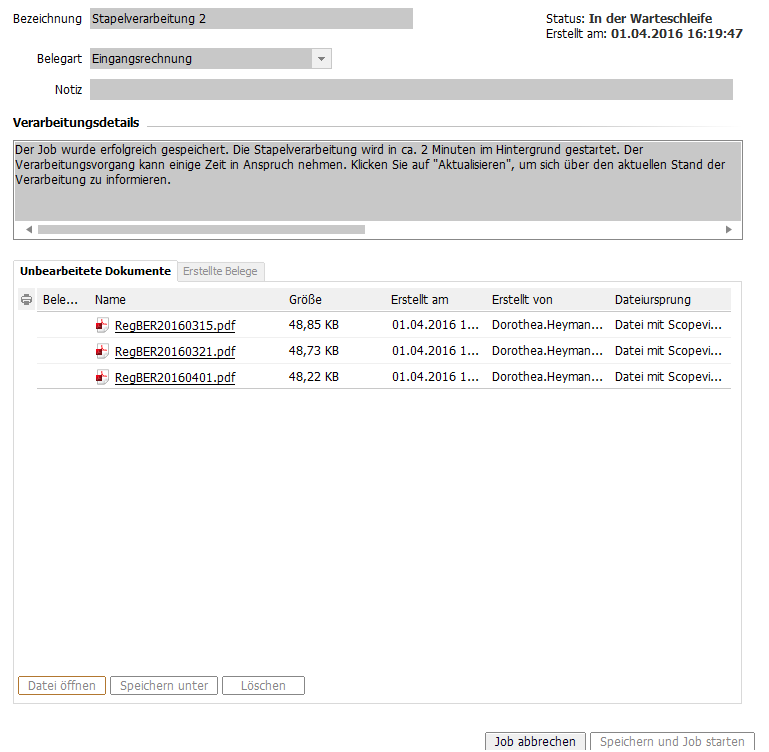
You can import vouchers for various postings via Organization > OpenScope > Voucher import. Select Add and specify the voucher type.
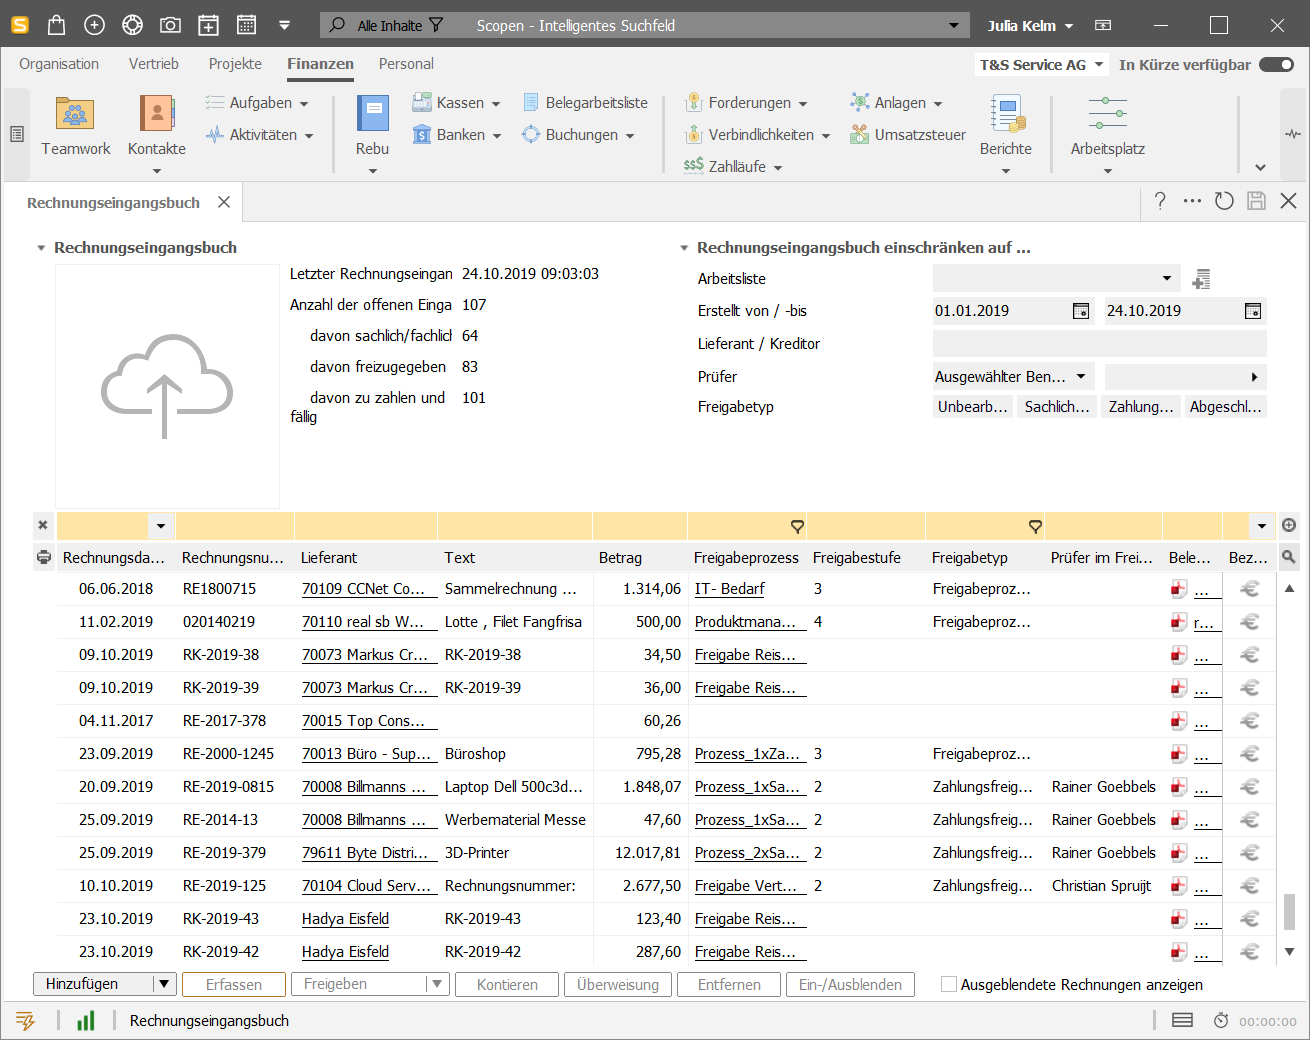
All documents with the document type "Incoming invoice" are automatically available in the invoice receipt book and may be assigned an invoice receipt number. Therefore, make sure you classify them correctly, otherwise documents that cannot be assigned to a release process will unintentionally end up in the Rebu.
"Credit notes" (better: correction invoices) from a supplier to you are incoming invoices.
Credit notes from a customer for your services (e.g. commission credit notes) are outgoing invoices.
You can give the batch a name and add a note. This note is displayed in the document worklist when posting.
Drag the invoices from their storage location to the Upload documents area or click in the area to retrieve documents from a local directory. Use the Teamwork button to access the DMS.
Then select Upload. The documents are now listed as unprocessed.
Important: A single file that you upload with the voucher import must not exceed the size limit of 20 MB. You should split larger files before importing them.
Select Save and start job to start the automatic document recognition (OCR) and process the documents. Recognition may take a moment.
You will then find the documents in the invoice receipt book and in the document worklist, depending on the settings and document type.
Import vouchers directly into the invoice receipt book
You can only upload individual invoices here. This procedure is not suitable for a mass import.
Select Finance > Payables > Invoice ledger or in the new ribbon Finance > Rebu > Invoice entry.
You can drag and drop the file to any location in the form to upload it.
To upload invoices individually, select Add or select Upload from Teamwork. Then select the invoice.
Some data is already filled in automatically based on the OCR recognition. Please check this, as not every invoice can be recognized correctly. You can then continue directly with invoice verification, approval and posting.
Scan receipts
Paper receipts should be scanned with a resolution of at least 300 dpi. You can process documents that you have already received in electronic form directly in digital form.
Document separation
You can use the cover sheets provided by Scopevisio to separate the individual receipts from one another. The OCR scan recognizes the cover sheets, splits the file back into the individual documents and the document type - incoming invoice, outgoing invoice or other document - is noted in the document worklist.
In this way, you can combine all your receipts into one batch. You should make sure that you place a cover sheet with the corresponding designation in front of each new voucher; e.g. the cover sheet labeled Cover sheet for incoming invoices in front of the incoming invoice to be scanned. If an invoice consists of several pages, place the sheets one behind the other and separate the invoice from the next document after the last page with a corresponding cover sheet.
Note: Please ensure that the cover sheets are scanned in portrait format.
If you would like to work without using the cover sheets, you can simply place blank sheets between the individual receipts. In the invoice receipt book settings , select whether automatic separation should take place after one blank page or after two blank pages (recommended for faxes with duplex scan function).
Cover sheets for document separation
Open Functions / Cover sheets and select Invoice receipt settings.
In the Automatic document separation section, mark the recognition of predefined cover sheets with a tick and select the Download cover sheets link. Then save the cover sheets and print them out.
Place the appropriate cover sheet on the stack of invoices that you are scanning. The OCR recognition recognizes the cover sheets, splits the file back into the individual documents and the document type incoming invoice, outgoing invoice or other document is noted in the document worklist.
Transfer separate receipts by e-mail
If you now send the PDF document with the e-mail subject [Receipt] to Scopevisio, your receipts appear separately in the receipt worklist and can be processed individually.
Transfer receipts from the scanner directly to Scopevisio
The hardware solution in conjunction with Fujitsu scanners (ScanSnap ix 100 or ix 500) and the ScanToScopevisio app is no longer offered, but existing users can of course continue to use it.
From modern scanners, you can simply send the receipt image to an e-mail address set up for incoming invoices.
Upload receipts via folder synchronization
Scan or save your receipts in a folder that you synchronize with Scopevisio.
Set up an upload folder
Create a new folder on your desktop or elsewhere on C:\ and give it a meaningful name, e.g. "Incoming invoices".
Note: The documents are only uploaded if you are logged in to Scopevisio.
Link Teamwork with a local folder
Follow the path System menu (S icon top left) > System administration > DMS Teamwork: Edit settings and scroll down to Link Teamwork to local folder. Here you can select up to ten folders on your computer whose content you would like to upload to Teamwork.
You can choose the name of the link yourself.
Use the Change directory link to select the folder to be synchronized from your system. If the folder has subfolders, corresponding subcollections are automatically created in Teamwork.
Use the Select collection link to determine which collection the contents of this folder should be uploaded to.
Set the document type, in this case accounting documents. The document PDFs are loaded directly into the document worklist.
In the Exclude list data field, you can enter file names or extensions that are in the upload folder but should not be uploaded to Teamwork. Enter the full file name to exclude a file (e.g. thumbs.db) and/or the file extensions to be excluded with *. in front of them (e.g. *.ini, *.csv). Separate the entries with commas.
You can activate or deactivate the link.
Click on [Folder 1] to synchronize additional folders with other Teamwork collections.
Upload receipts by email
You can import receipts by email using a personal email address.
To do this, send an email to your personal email address as described in the link above. In the subject line, write [AR] for outgoing invoice, [ER] for incoming invoice or [Beleg] for other voucher and attach the vouchers. These will then appear under the appropriate categories in your document worklist.
If necessary, use the scan-to-mail function of your scanner. In this way, you can have the scanner automatically send your incoming documents to Scopevisio and assign the document types correctly.


