Create and edit quotations using text modules and the product catalog.
Further information: Overview of the document flow.
Quotation overview
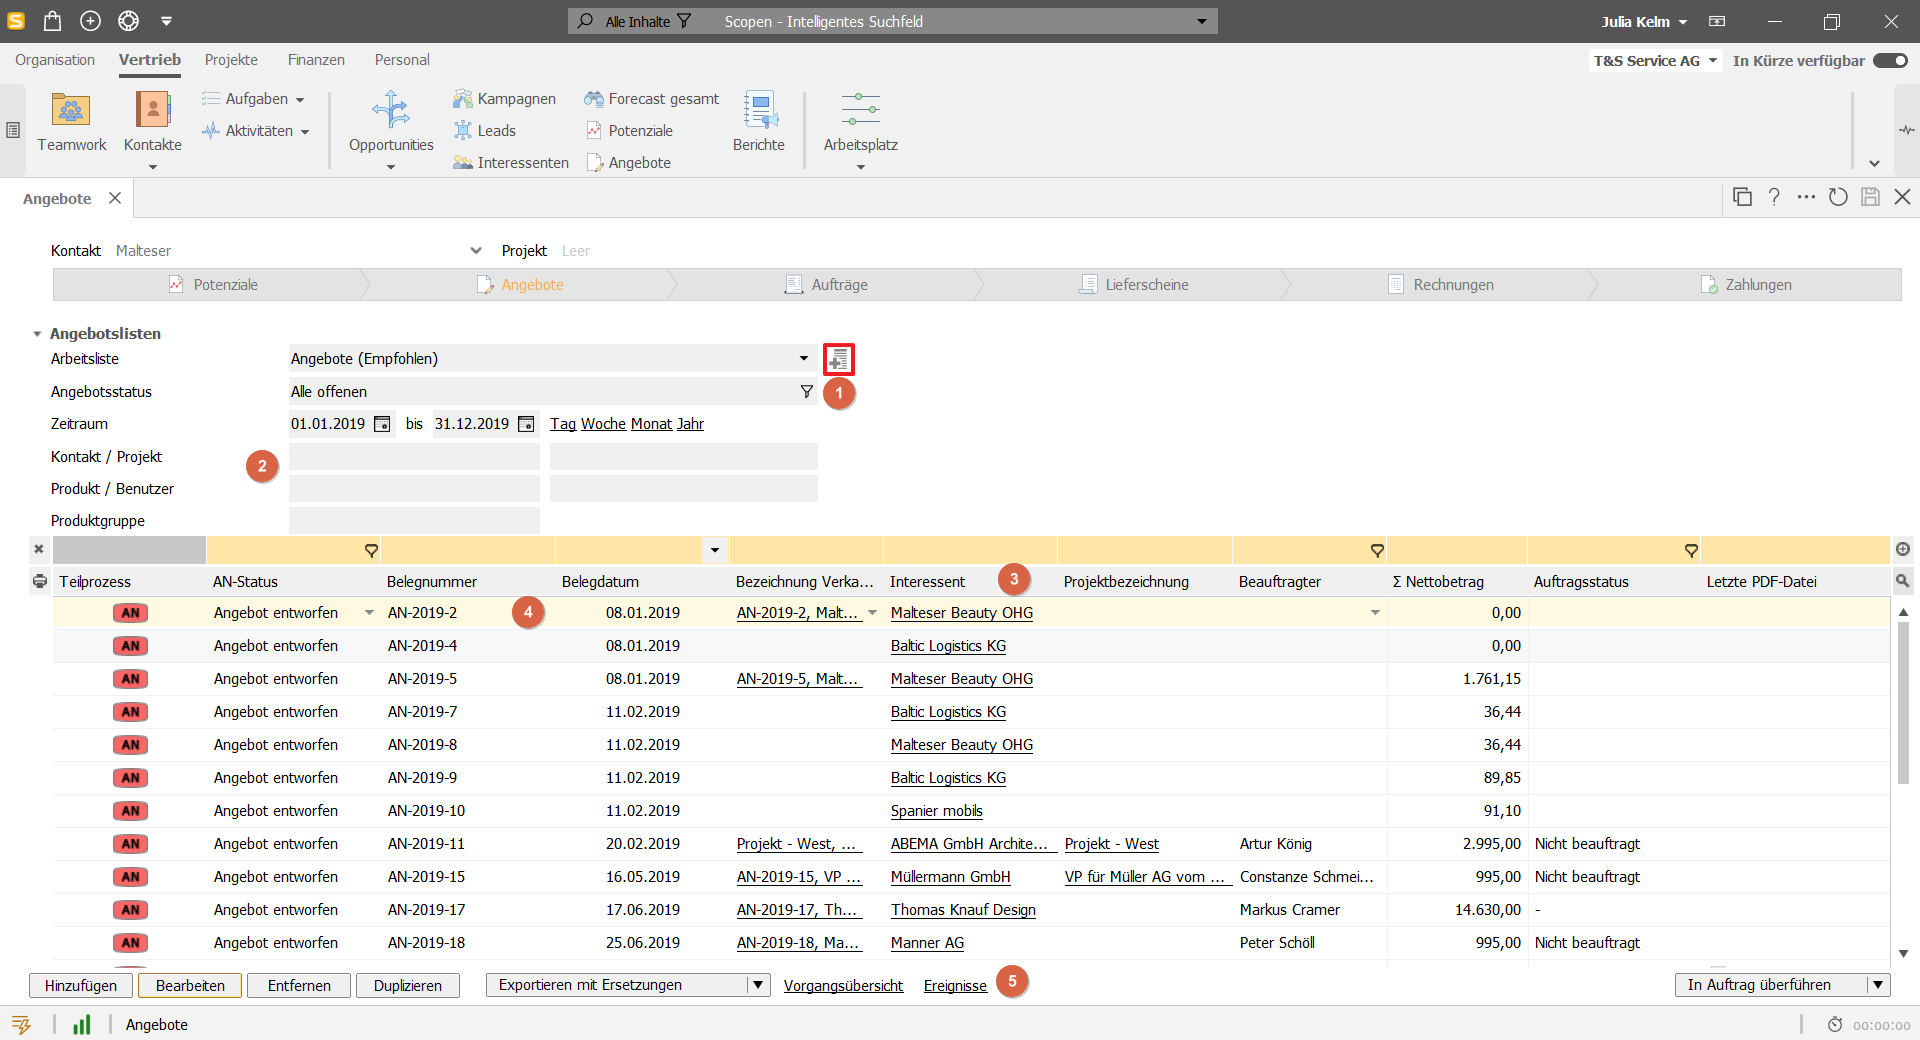
All quotations are listed in the overview table, including their processing status.
Select status and filter criteria to save a quotation list as a worklist (see worklist icon above 1).
Call up specific offers that are related to a project, contact, product or user.
Show or hide columns by right-clicking on the table heading. Or use the yellow filter line.
Select an offer (4) to see details in the process bar, check the event log (5) or edit it using the action buttons below the list.
Create a new offer
There are numerous ways to create a quote:
Select the Write quote command via the plus symbol.
Use the Add button in the quotation overview.
If you are working with potentials, you can easily convert a potential that has already been entered into a quotation.
Via further actions (three dots) from a contact.
Via further actions (three dots) from a customer project.
If you create the quotation from a master data form (contact, project) (via further actions or the plus), the quotation is directly pre-filled with this data.
The quotation form
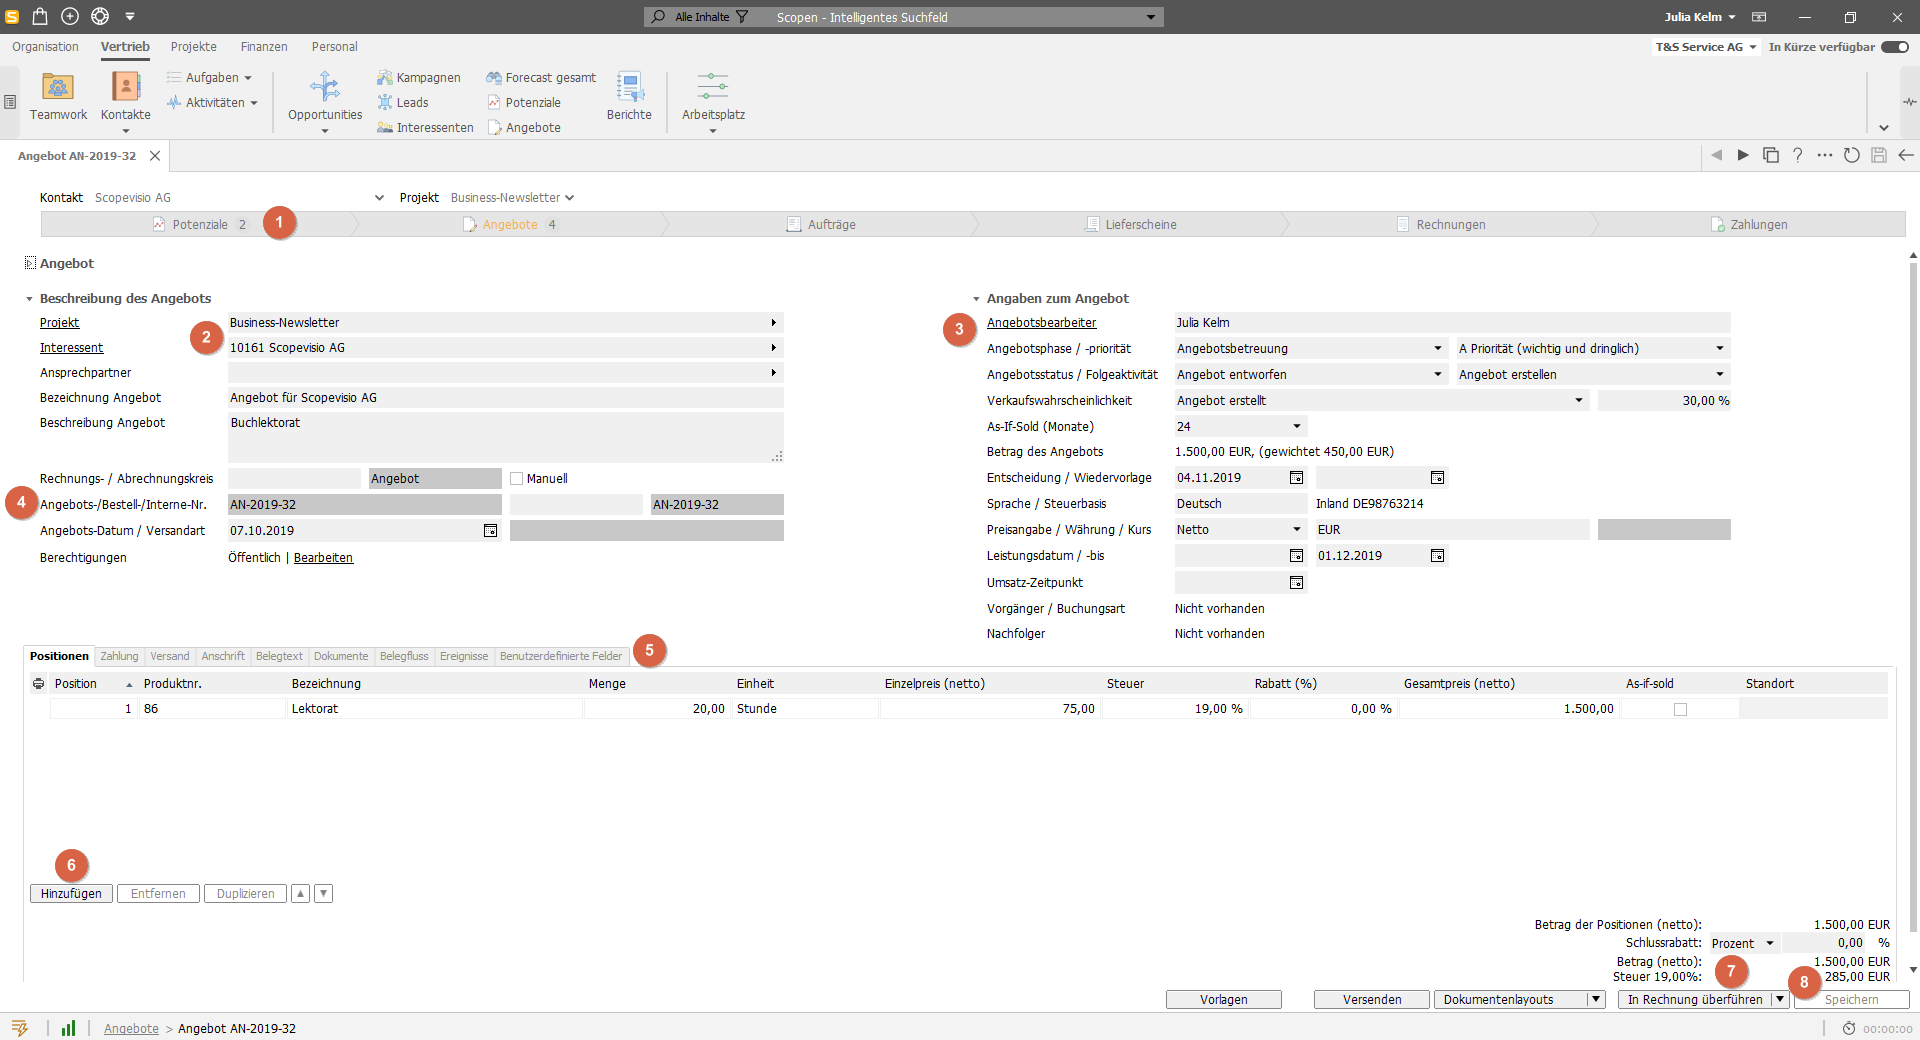
The process bar uses mouseover texts to show which processes are pending at which stage for the contact.
Enter a prospective customer or, if available, a project reference (projects license required).
For your sales forecast, you can specify the sales probability and define a follow-up activity for a structured process. If necessary, delegate the offer to a responsible person.
The quotation number is automatically assigned from the number range. Note the option to set authorizations for the offer.
In addition to the tab with the offer items, other tabs provide access to additional information and settings.
Use the Add button to enter at least one item. Select an item to remove it, duplicate it or move it up or down using the arrow buttons.
You can later use this button to convert the quote into an order, an invoice and/or a delivery bill.
Don't forget to save it.
Dimensions for quotations
Select Billing > Quotations in the old menu treeor Sales > Quotationsin the new menu tree.
You can already specify dimension accounts (e.g. cost centers) when creating a quote. The dimensions are retained when transferring to the order or invoice.
Send quotation
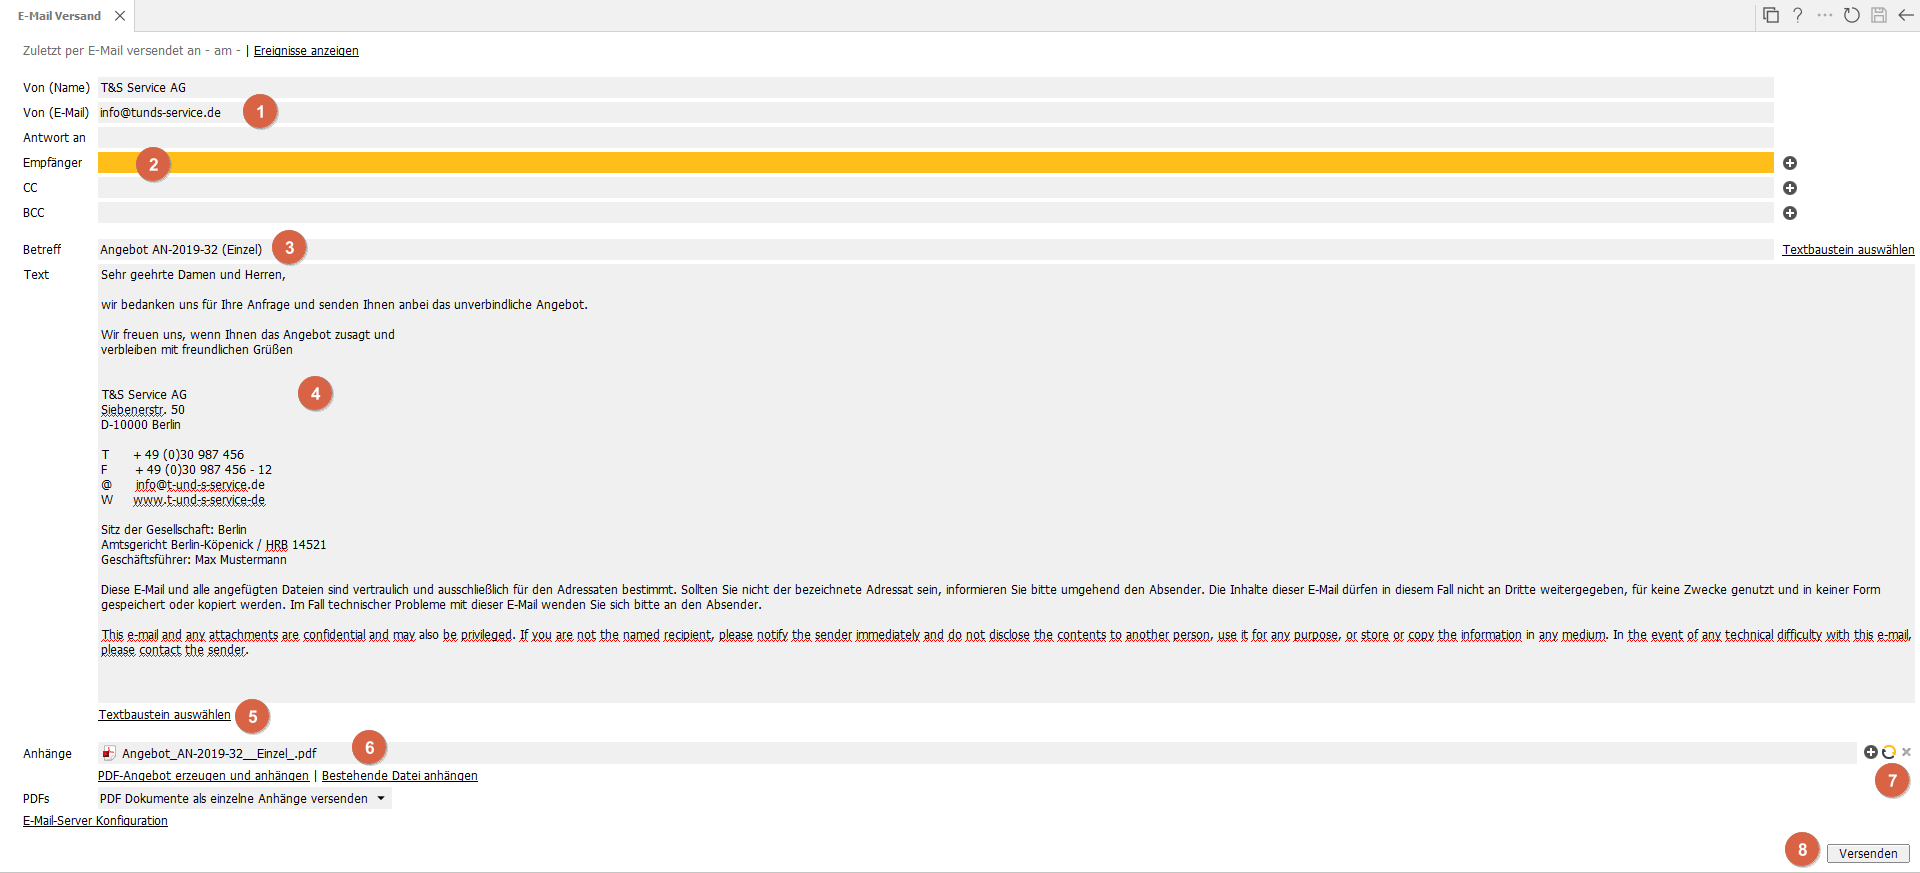
To send your quotation directly by e-mail, click on the Send button. The e-mail can then be sent directly from the program.
You can enter different sender and reply e-mail addresses.
The recipient e-mail address is automatically inserted from the contact management, but can be changed (like all details).
The offer number is automatically used as the subject.
The predefined text.
You can insert text modules and placeholders at a later date; for explanations, see further down in this article.
The offer PDF is automatically attached. Double-click to open it for a final check.
You can attach further documents, load documents from Teamwork and delete selected attachments.
Click on Send to send the quote.
Output offer
Select the down arrow on the Post-process button. You can print the quote, print it in Word or select a document layout for it.
Output quotation as PDF/A
Select Print to output the quote as a PDF/A file. The PDF/A standard is tamper-proof.
Output quotation as Word file.
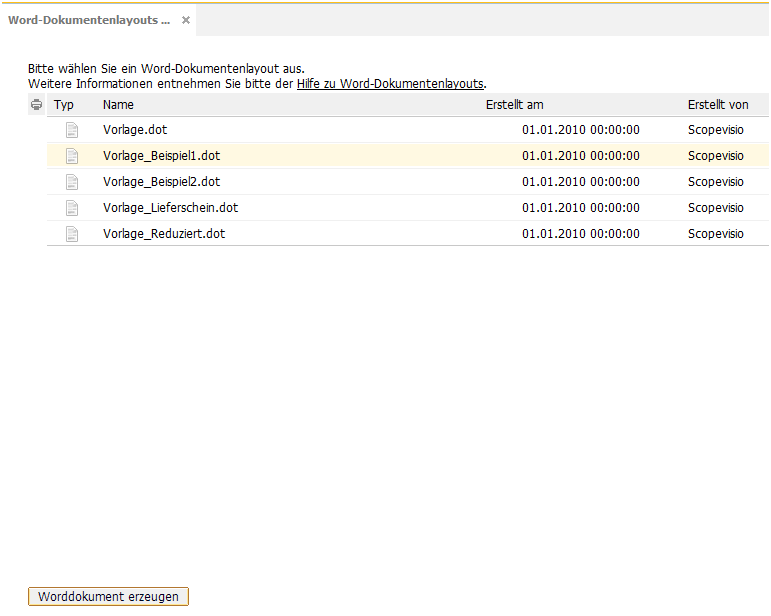
Select Print Word to output the quote as a Word file. You will be redirected to your Word document layouts and can select the appropriate layout. Then select Create Word document.
Quotation on document layout
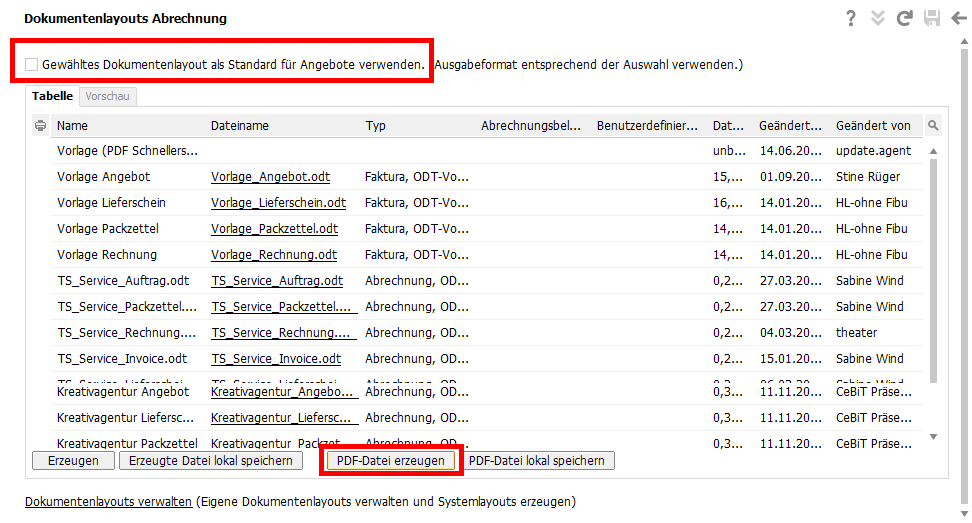
Actually the most common way: Select Document layouts to use a prepared layout for your quotation. Select the link of the layout to customize it to your needs (more about this in the article Document layouts). By ticking a checkbox, you can set a selected layout as the default layout.
If the layout and the quotation data are correct, select the Create PDF file button to generate the quotation.
